

This post may contain affiliate links. If you buy through them, we may earn a small commission at no extra cost to you. Learn more
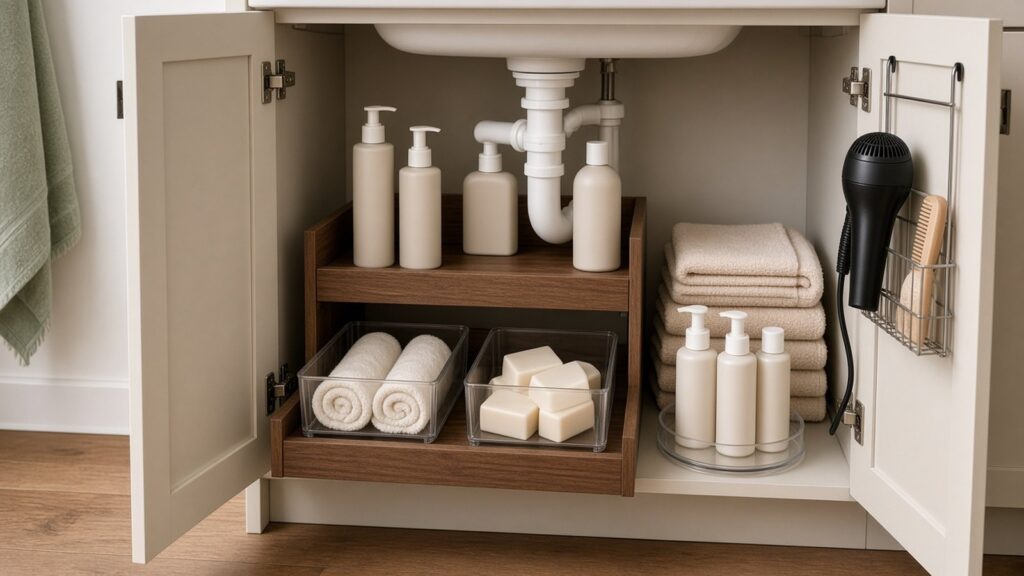
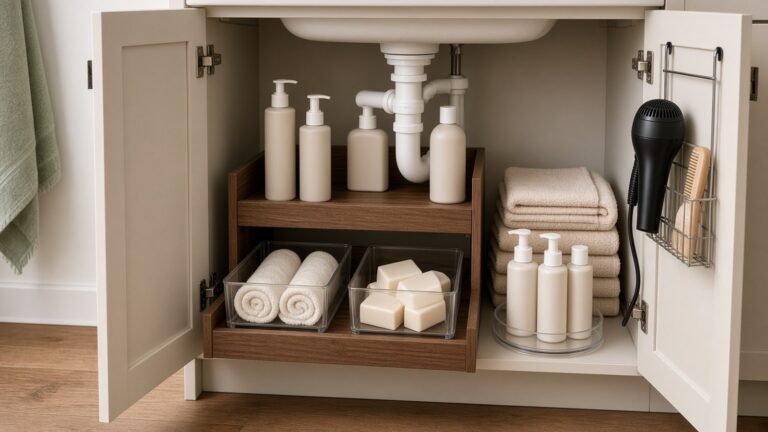
If you’re wondering how to organize under bathroom sink cabinets so they stay tidy, start by emptying the cabinet and checking for leaks. Then edit down to what you actually use, measure the space around the drain pipe, and give every category its own zone: daily toiletries at the front, backups behind them, cleaning supplies on one side, and hair tools on the door. A pull-out organizer, a few clear bins, and a waterproof liner do most of the work.
Below: a 9-step plan, ideas for shared bathrooms, kids, and renters, what not to keep under the sink, a checklist, common mistakes, and an FAQ.
What Belongs Under a Bathroom Sink (and Where)
A vanity is a small, damp space split by a drain pipe. It works best with a few clear categories instead of “everything that didn’t fit on the counter.” A simple zone plan:
| Zone | What goes there | Easiest container |
|---|---|---|
| Front, widest side | Daily toiletries you reach for every morning | Pull-out drawer or two-tier organizer |
| Back corners | Backups: one spare of each product | Clear bin or small turntable |
| One side, up high if possible | Bathroom cleaning supplies | Small caddy you can carry out |
| Inside of the door | Hair dryer, brushes, flat tools | Over-the-door basket or caddy |
| Under or in front of the trap | Spare toilet paper, washcloths | Low lidded bin or shelf riser |
Bulk packs, guest towels, and backstock beyond one spare usually fit better in a hall closet.
How to Organize Under Bathroom Sink Cabinets: 9 Steps
1. Empty the cabinet and look for leaks
Take everything out and put it on a towel on the floor. With the cabinet empty, run the faucet for a minute and check the drain pipe, the supply lines, and the shut-off valves for drips. Look for warping, stains, or a musty smell. Fix any leak first, or call your landlord if you rent.
2. Clean, dry, and line the base
Wipe the cabinet with a mild cleaner, then let it dry completely with the doors open. Add a waterproof shelf liner or a mat with raised edges. It catches small drips and makes them easy to spot.
3. Edit before you buy anything
Sort what came out into keep, move elsewhere, and toss. Get rid of expired sunscreen and skincare, dried-out products, near-empty bottles, and hotel samples you never use. Combine duplicates. If the purge feels slow, our decluttering checklist of 50 things to throw away today includes plenty of bathroom items to start with.
4. Measure around the drain pipe
Measure the inside width of the cabinet, then the clear width on each side of the pipe, the depth from the door frame to the back wall, and the height under the curve of the trap. Also check how far the hinges and the face frame stick in, because they can stop a wide bin from sliding out. Write the numbers down before you shop.
5. Assign zones
Use the zone plan above. Put the things you use every day on the widest side at the front, backups behind them, and cleaning supplies together on the other side. Keep the area right around the shut-off valves clear so you can reach them fast.
6. Add a pull-out drawer on the widest side
Sliding storage brings the back row to you. A two-tier pull-out organizer fits around the drain when it’s narrow enough; a single-level drawer works when one side has more room. For example, SpaceAid’s no-drill pull-out cabinet organizer attaches with adhesive tape, is 17 inches deep and 2.3 inches tall, and adjusts from 11.8 to 19.6 inches wide, so it only suits a vanity with at least that much clear width beside the pipe. Check your measurements from step 4 first.
7. Use the height you’re wasting
Most vanities have a tall, empty gap above short bottles. A shelf riser doubles the usable floor: bottles on top, a low bin underneath. Risers often fit in front of the drain, too, if there are about 10 inches between the pipe and the door. SpaceAid’s metal and wood cabinet shelf measures 13 by 9.75 inches and 7.25 inches tall, which leaves room for a roll of toilet paper or a small bin below.
8. Put the cabinet doors to work
The inside of the doors is free space for flat or hanging items: a hair dryer, a round brush, a flat iron, or a comb. Use an over-the-door basket or caddy, and check that it clears the pipes and the sink bowl when the door shuts. Always let hot tools cool completely before you put them away.
9. Corral small things in clear bins, then label
Clear, open-top bins keep categories apart and let you see what’s inside: one for hair accessories, one for razors and refills, one for first aid basics. Put a small turntable in a back corner for tall bottles so nothing hides behind anything else. Label each bin so everyone puts things back in the same place.
Ideas for Shared Bathrooms, Kids, and Renters
Shared bathrooms: one bin per person
When two or more people share a vanity, give each person one bin or one drawer in the pull-out, in a different color or with a name label. Shared items like toothpaste backups and cleaning supplies get their own neutral zone. It ends the “whose is this?” pile.
Homes with young kids or pets
Install child safety latches on the vanity doors if small children live in or visit your home. Better yet, move cleaning products, razors, and anything else risky to a high shelf or a locked box, and keep only kid-safe items under the sink. Store cleaners in their original labeled containers, and never keep products that shouldn’t be mixed (such as bleach and ammonia-based cleaners) loose in the same bin.
Renters: no holes, no damage
Freestanding bins, risers, turntables, and over-the-door caddies need no tools at all. Adhesive pull-outs avoid drilling, but test the tape on a hidden spot and remove it carefully before you move out. Our guide to renter-friendly storage hacks (no damage) has more ideas that come out cleanly.
Tiny vanities and pedestal sinks
If your vanity is very narrow, or you have a pedestal sink with no cabinet at all, the storage has to move elsewhere: above the toilet, on the back of the door, or in a slim rolling cart. See our small bathroom storage ideas without drilling for the rest of the room.
What Not to Store Under the Bathroom Sink
The space under a bathroom sink gets warm, humid, and sometimes wet. A few things are better kept somewhere else:
- Medications. Many labels say to store them in a cool, dry place, and a bathroom often isn’t one. A closet shelf or a kitchen cabinet away from the stove is usually a better spot.
- Bulk paper goods. One or two spare rolls of toilet paper are handy, but keep them in a lidded bin so a drip doesn’t ruin them, and store the big pack elsewhere.
- Anything flammable or very hazardous, especially near a hair dryer or other hot tools.
- Things that belong in other rooms, like kitchen backstock, tools, or batteries. If your kitchen sink cabinet is the overflow spot, our under-sink kitchen organization ideas show how to set up that cabinet too.
Under Bathroom Sink Organization Checklist
- ☐ Cabinet emptied and pipes checked for leaks
- ☐ Base cleaned, fully dry, and lined
- ☐ Expired, empty, and unused products removed
- ☐ Width on both sides of the pipe, depth, and trap height measured
- ☐ Zones set: daily, backups, cleaning, hair tools
- ☐ Pull-out or two-tier organizer on the widest side
- ☐ Riser or stackable drawers using the vertical space
- ☐ Door caddy for hair tools, clear of the pipes
- ☐ Bins labeled, one per person in shared bathrooms
- ☐ Shut-off valves easy to reach; safety latch added if needed
Common Mistakes to Avoid
- Shopping before measuring. Many organizers are wider than the space beside a bathroom drain. Measure first, including the hinges and the face frame.
- Storing hot or damp items. A warm curling iron or a wet washcloth in a closed cabinet adds heat and moisture. Let things cool and dry first.
- Filling every inch. A packed cabinet hides leaks and blocks the shut-off valves. Leave a little open space around the pipes.
- Keeping a whole warehouse of backups. One spare of each product is enough under the sink; the rest can live in a closet.
- Using lidded boxes for daily items. Lids add a step, so things end up on the counter. Save lids for toilet paper and backstock.
- Skipping the liner. A slow drip can damage a vanity floor before you notice it. A liner is a cheap layer of protection.
FAQ: How to Organize Under the Bathroom Sink
How do I organize under my bathroom sink with pipes in the way?
Treat the drain as a fixed divider. Measure the clear width on each side, put a pull-out drawer or a narrow two-tier organizer on the wider side, and use a slim bin or caddy on the other. A low riser or bin can often sit in front of the pipe, and the doors can hold hair tools.
What should you not keep under the bathroom sink?
Skip medications that should be kept cool and dry, bulk paper goods, flammable products, and anything unsafe within reach of children. Keep cleaning products in their original containers, and don’t store chemicals that shouldn’t be mixed in the same open bin.
How do I keep the cabinet under my bathroom sink dry?
Fix leaks first, then add a waterproof liner. Wipe bottles before putting them back, let towels and hot tools dry or cool before storing them, and air the cabinet out after steamy showers now and then. Check the pipes during a quick monthly reset.
Is it okay to store toilet paper under the bathroom sink?
Yes, a few rolls are fine if the cabinet is dry. Keep them in a lidded bin or on a riser off the cabinet floor so a small leak can’t soak them, and keep larger packs in a closet.
A Vanity That Stays Organized
Learning how to organize under the bathroom sink comes down to a few habits: check for leaks, edit, measure around the pipe, zone it, and use the height and the doors. A two-minute monthly check keeps it that way: toss empties, move a spare forward, and look for moisture. Pair it with a short 15-minute daily cleaning routine, and the bathroom stays calm with very little effort.



Leave a Reply